
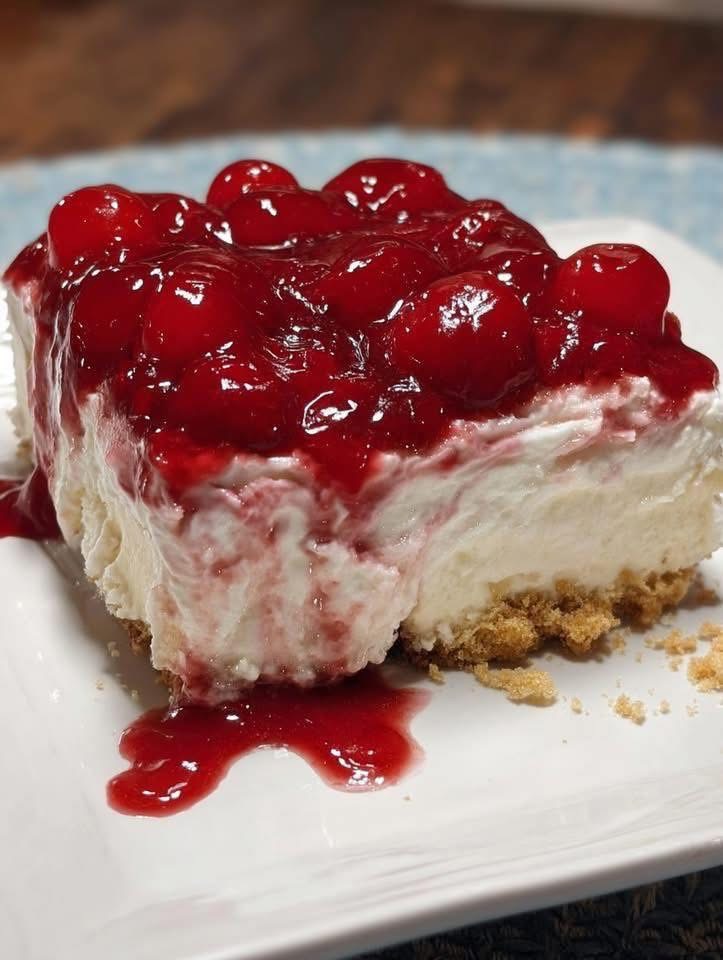
Of course! Here is a recipe for the classic, no-bake dessert known as Cherry Delight. This retro recipe features a creamy, sweet filling on a crunchy graham cracker crust, all topped with bright cherry pie filling. It’s incredibly easy to make and always a crowd-pleaser.
Classic Cherry Delight
This dessert is known by many names (Cherry Cream Cheese Dessert, Cherry Yum Yum), but it’s always a hit at potlucks and family gatherings.
Why You’ll Love It:
· No-Bake: Perfect for hot days or when you don’t want to turn on the oven.
· Make-Ahead: It needs to chill for several hours, making it ideal for preparing the day before.
· Crowd-Pleaser: Its sweet, creamy, and fruity flavors are loved by both kids and adults.
Recipe
Yield: 9×13 inch pan (about 12-15 servings) Prep Time: 20 minutes Chill Time: 4+ hours (preferably overnight)
Ingredients:
For the Crust:
· 2 cups graham cracker crumbs (about 15-16 full sheets)
· ½ cup (1 stick) unsalted butter, melted
· ¼ cup granulated sugar
For the Cream Cheese Layer:
· 16 oz (2 packages) cream cheese, softened to room temperature
· 1 cup powdered sugar
· 1 teaspoon vanilla extract
· 1 (8 oz) tub frozen whipped topping (e.g., Cool Whip), thawed
For the Topping:
· 2 (21 oz) cans cherry pie filling (or your favorite fruit pie filling)
Instructions:
- Make the Crust:
· In a medium bowl, mix the graham cracker crumbs, melted butter, and granulated sugar until combined and it resembles wet sand.
· Press the mixture firmly and evenly into the bottom of a 9×13 inch baking dish. A flat-bottomed glass or measuring cup helps to press it down firmly.
· Place the crust in the refrigerator to set while you prepare the filling. - Make the Cream Cheese Layer:
· In a large bowl, use an electric hand mixer (or a stand mixer) to beat the softened cream cheese until it is smooth and creamy.
· Add the powdered sugar and vanilla extract. Beat on medium speed until fully combined and smooth. Scrape down the sides of the bowl as needed.
· Using a spatula, gently fold in the entire tub of thawed whipped topping until no white streaks remain. Be gentle to keep the mixture light and fluffy. - Assemble:
· Remove the chilled crust from the refrigerator.
· Spread the cream cheese mixture evenly over the crust.
· Carefully spread the cherry pie filling over the cream cheese layer. - Chill:
· Cover the pan with plastic wrap and refrigerate for at least 4 hours, but preferably overnight. This is crucial for the layers to set and for the flavors to meld together. - Serve:
· Cut into squares and serve cold. Store any leftovers covered in the refrigerator for up to 3 days.
Recipe Variations & Tips:
· Different Crusts: You can use crushed vanilla wafers, shortbread cookies, or even pretzels (for a sweet & salty twist) instead of graham crackers.
· Different Toppings: Not a cherry fan? Use blueberry pie filling, apple pie filling, or sliced fresh strawberries (tossed with a little sugar to draw out their juices).
· Lemon Zest: Add a tablespoon of lemon zest to the cream cheese mixture for a bright, citrusy note that pairs beautifully with the cherries.
· Ensure Cream Cheese is Soft: Letting the cream cheese sit at room temperature for an hour is key. If it’s too cold, you’ll end up with lumps in your filling.
· Don’t Skip the Chill: This is the most important step! It allows the crust to firm up and makes the dessert much easier to slice cleanly.
· Homemade Whipped Cream: If you prefer not to use frozen whipped topping, you can make your own. Whip 1 ½ cups of heavy cream with ¼ cup of powdered sugar until stiff peaks form, and fold it into the cream cheese mixture. Note: The texture will be slightly less stable but still delicious.
Enjoy this classic, comforting, and delicious dessert