
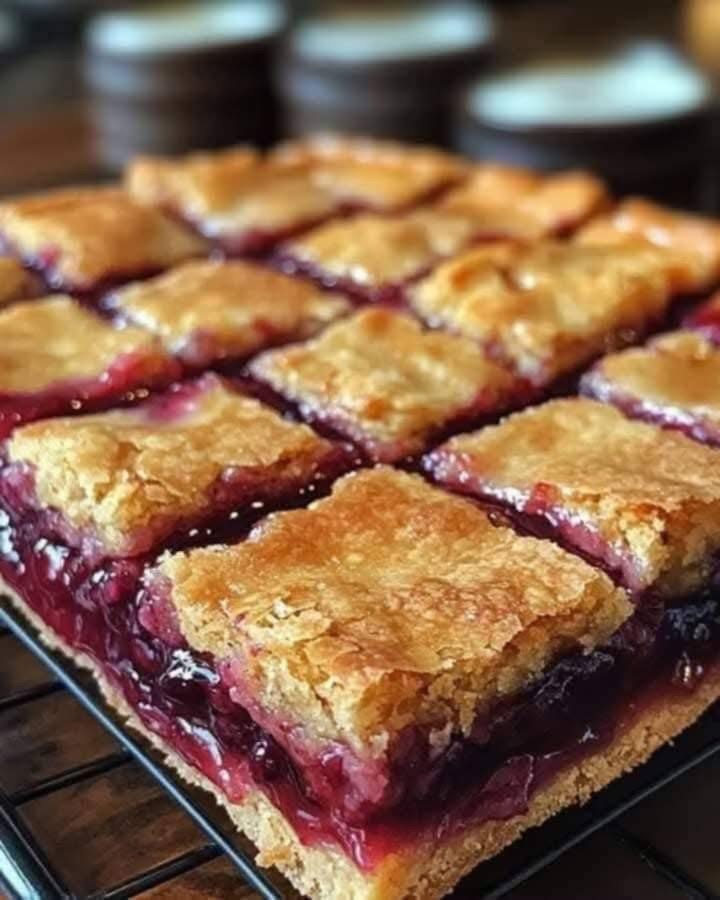
Of course! Cherry Bars are a classic, easy, and delicious dessert that’s perfect for potlucks, bake sales, or a simple sweet treat at home. They feature a buttery shortbread-like crust and topping with a layer of sweet cherry pie filling in the middle.
Here’s a comprehensive guide and a classic recipe for them.
Key Characteristics of Cherry Bars:
· Easy to Make: Much simpler than making a pie, with no rolling pin required.
· Portable: They are sturdy and easy to transport, making them ideal for gatherings.
· Buttery Crust: The base is a simple, shortbread-style dough.
· Sweet & Tart Filling: Typically made with canned cherry pie filling, providing a vibrant, fruity center.
· Simple Glaze: Often finished with a drizzle of sweet vanilla icing.
Classic Cherry Bars Recipe
This recipe uses a press-in crust and crumble topping, making it incredibly straightforward.
Ingredients:
For the Crust and Crumble:
· 1 cup (2 sticks / 226g) unsalted butter, softened
· 2 cups (250g) all-purpose flour
· 1/2 cup (100g) granulated sugar
· 1/4 teaspoon salt
For the Filling:
· 1 can (21 oz) cherry pie filling (or your favorite flavor: apple, blueberry, etc.)
· 1 tablespoon lemon juice (to brighten the cherry flavor)
· 1/2 teaspoon almond extract (highly recommended for that “cherry bake shop” flavor)
For the Glaze (Optional):
· 1 cup (120g) powdered sugar
· 1-2 tablespoons milk or cream
· 1/2 teaspoon vanilla or almond extract
Instructions:
- Preheat and Prepare: Preheat your oven to 350°F (175°C). Grease or line a 9×13 inch baking pan with parchment paper, leaving an overhang on two sides for easy removal.
- Make the Dough: In a large bowl, use an electric mixer (or a fork) to combine the softened butter, flour, granulated sugar, and salt. Mix until it comes together in a crumbly dough. It will look like coarse sand at first, but will clump together when pressed.
- Press the Crust: Reserve about 1 ½ cups of the dough for the topping. Press the remaining dough firmly and evenly into the bottom of the prepared pan.
- Pre-Bake: Bake the crust for 12-15 minutes, or until the edges are just barely starting to turn golden. Remove from the oven (leave the oven on).
- Prepare Filling: While the crust is baking, stir the lemon juice and almond extract into the can of cherry pie filling.
- Assemble: Spread the cherry filling evenly over the hot, partially baked crust. Crumble the reserved dough evenly over the top of the cherry layer.
- Bake Again: Return the pan to the oven and bake for 30-35 minutes more, or until the top is light golden brown and the filling is bubbly around the edges.
- Cool Completely: This is crucial! Allow the bars to cool completely in the pan set on a wire rack. This can take 1-2 hours. This step allows the filling to set, making them much easier to cut.
- Add Glaze (Optional): Once completely cool, whisk together the powdered sugar, milk, and extract for the glaze. Add milk one tablespoon at a time until you reach a drizzling consistency. Drizzle over the bars.
- Cut and Serve: Use a sharp knife to cut into squares. For clean cuts, wipe the knife blade clean between slices.
Tips for Success:
· Don’t Skip the Pre-Bake: Pre-baking the crust ensures it stays firm and doesn’t get soggy from the cherry filling.
· Cooling is Key: Cutting into these bars while they are still warm will result in a messy, gooey (still delicious) situation. For neat, perfect squares, patience is essential.
· Variations:
· Other Fruits: This recipe works with any canned pie filling—apple, blueberry, peach, or apricot are all fantastic.
· Cream Cheese Layer: For a next-level version, spread a thin layer of sweetened cream cheese mixture over the hot crust before adding the cherry filling.
· Oats or Nuts: Add 1/2 cup of old-fashioned oats or chopped almonds to the crumble topping for extra texture.
Enjoy your baking! These bars are always a crowd-pleaser.