
Of course! Making a classic Sourdough Sandwich Bread is one of the most rewarding baking projects. It yields a loaf with a tender, soft crumb, a slightly tangy flavor, and a beautiful, golden crust that’s perfect for sandwiches and toast.
This recipe is designed to be approachable and reliable, using an active, bubbly sourdough starter instead of commercial yeast.
Classic Sourdough Sandwich Bread
This recipe creates a soft, slightly tight crumb ideal for holding sandwich fillings, with a flavor that is milder than a rustic sourdough boule.
Yields: One 9×5 inch loaf
Prep Time: 30 minutes active, 12-18 hours total (including proofing)
Ingredients
For the Levain (Starter Build):
· 50g active, bubbly sourdough starter (100% hydration)
· 100g bread flour
· 100g warm whole milk (or water)
For the Main Dough:
· All of the prepared levain
· 350g bread flour
· 50g whole wheat flour (optional, can use all bread flour)
· 210g warm whole milk (or water)
· 1 large egg, at room temperature
· 30g unsalted butter, softened (or olive oil)
· 25g honey or granulated sugar
· 9g fine sea salt
For Topping:
· 1 tbsp milk or melted butter, for brushing
· Rolled oats or seeds (optional)
Instructions
Step 1: Make the Levain (6-8 hours before mixing dough)
- Combine the 50g active starter, 100g flour, and 100g warm milk in a clean jar or bowl.
- Cover and let it sit at room temperature for 6-8 hours, or until it is at least tripled in volume, very bubbly, and has a pleasant, slightly sour aroma. It should be at or just past its peak.
Step 2: Mix the Dough (Autolyse)
- In the bowl of a stand mixer (or a large bowl), whisk together the bread flour and whole wheat flour.
- In a separate jug, whisk together the 210g warm milk, egg, honey, and all of the ripe levain until smooth.
- Pour the wet ingredients into the dry ingredients. Mix with a dough hook or a spatula until just combined and no dry flour remains. It will be a shaggy mass.
- Cover the bowl and let it rest (autolyse) for 30-60 minutes. This helps the flour fully hydrate and makes the dough less sticky and easier to work with.
Step 3: Develop the Dough
- After the autolyse, sprinkle the salt over the dough.
- Knead with a stand mixer: Using the dough hook, knead on medium-low speed for 5-7 minutes until the dough becomes smoother and starts to cling to the hook.
- Add Fat: With the mixer running, add the softened butter one small piece at a time, waiting for each piece to be incorporated before adding the next. This will take a few minutes. The dough may look slippery and fall apart initially, but will come back together.
- Continue Kneading: Once all the butter is in, knead for another 3-5 minutes on medium speed until the dough is very smooth, elastic, and passes the “windowpane test” (you can stretch a small piece thinly enough to see light through it without it tearing).
- By Hand Alternative: This is a sticky dough, but you can do it by hand. Use a “slap and fold” technique on a lightly oiled counter for 10-15 minutes after adding the butter until smooth and elastic.
Step 4: Bulk Fermentation (First Rise)
- Place the dough in a lightly oiled bowl, turn it over to coat, and cover tightly.
- Let it rise at room temperature (70-75°F / 21-24°C is ideal) for 4-8 hours. The time varies wildly based on your starter and kitchen temperature. The dough is ready when it has just about doubled in size and is full of air pockets. Do not let it over-ferment.
Step 5: Shape the Loaf
- Gently turn the dough out onto a lightly floured surface. Being careful not to degas it completely, press it into a rough rectangle.
- Fold the top third of the dough down to the center, then the bottom third up (like a letter).
- Starting from the top, tightly roll the dough into a log, pinching the final seam closed.
- Place the loaf, seam-side down, into a greased 9×5 inch loaf pan.
Step 6: Second Proof (Final Rise)
- Cover the loaf pan with a damp cloth or plastic wrap.
- Let it proof until the dough crowns about 1-1.5 inches above the rim of the pan. This can take 2-4 hours at room temperature.
· Cold Proof Option (Recommended for Flavor): For more sour flavor, place the shaped loaf in the pan in the refrigerator for 8-16 hours. Let it sit at room temperature for 1-2 hours before baking to take the chill off.
Step 7: Bake
- Preheat your oven to 375°F (190°C).
- Score: Just before baking, you can make one shallow slash down the center of the loaf with a sharp knife or razor blade. This controls the expansion.
- Bake: Bake for 35-45 minutes. The loaf is done when it has a deep golden-brown crust, sounds hollow when tapped on the bottom, and the internal temperature registers 190-200°F (88-93°C).
- Optional Topping: For a soft crust and a beautiful look, brush the top with milk or melted butter as soon as it comes out of the oven. You can also sprinkle with oats before baking.
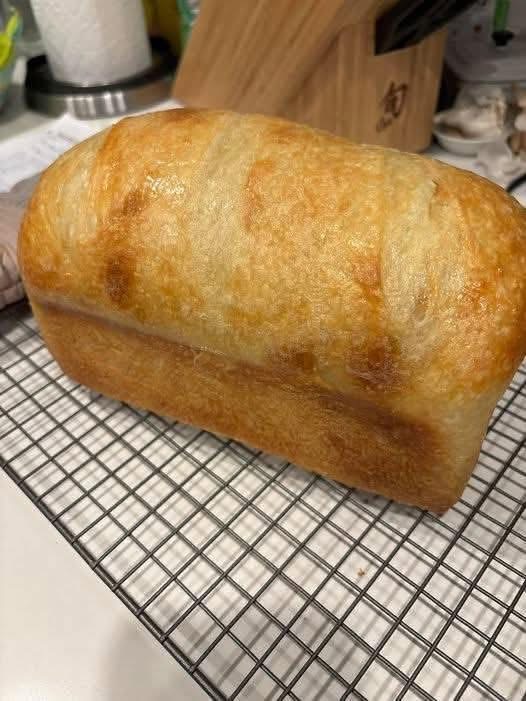
Step 8: Cool (This is Crucial!)
- Immediately remove the loaf from the pan and place it on a wire rack.
- Let it cool completely for at least 4-6 hours before slicing. The bread is still cooking internally from residual heat, and slicing it warm will result in a gummy, dense texture.
Pro Tips for Success
· Starter Health is Key: Your starter must be active and recently fed to provide the necessary rise. If it doesn’t float in water, it’s not quite ready.
· Temperature is Everything: Cooler temperatures slow fermentation, leading to more complex flavor. The long, slow proof in the fridge is the secret to a fantastic sourdough taste.
· Don’t Rush the Proof: Sourdough takes time. Look for the visual cues (doubled in size, domed above the pan) rather than the clock.
· Use a Thermometer: An instant-read thermometer is the only surefire way to know your bread is perfectly baked.
· Storage: Once completely cool, store in a bread bag or airtight container at room temperature for 4-5 days. For longer storage, slice and freeze for up to 3 months.
Enjoy the process and the incredible taste of your homemade sourdough sandwich bread