
Excellent choice! No-Bake Chocolate Oat Bars are a classic, easy, and delicious treat. They’re like a cross between a granola bar and a fudgey candy bar. They are perfect for when you need a sweet fix without turning on the oven.
Here’s a reliable and highly-rated recipe for these irresistible bars.
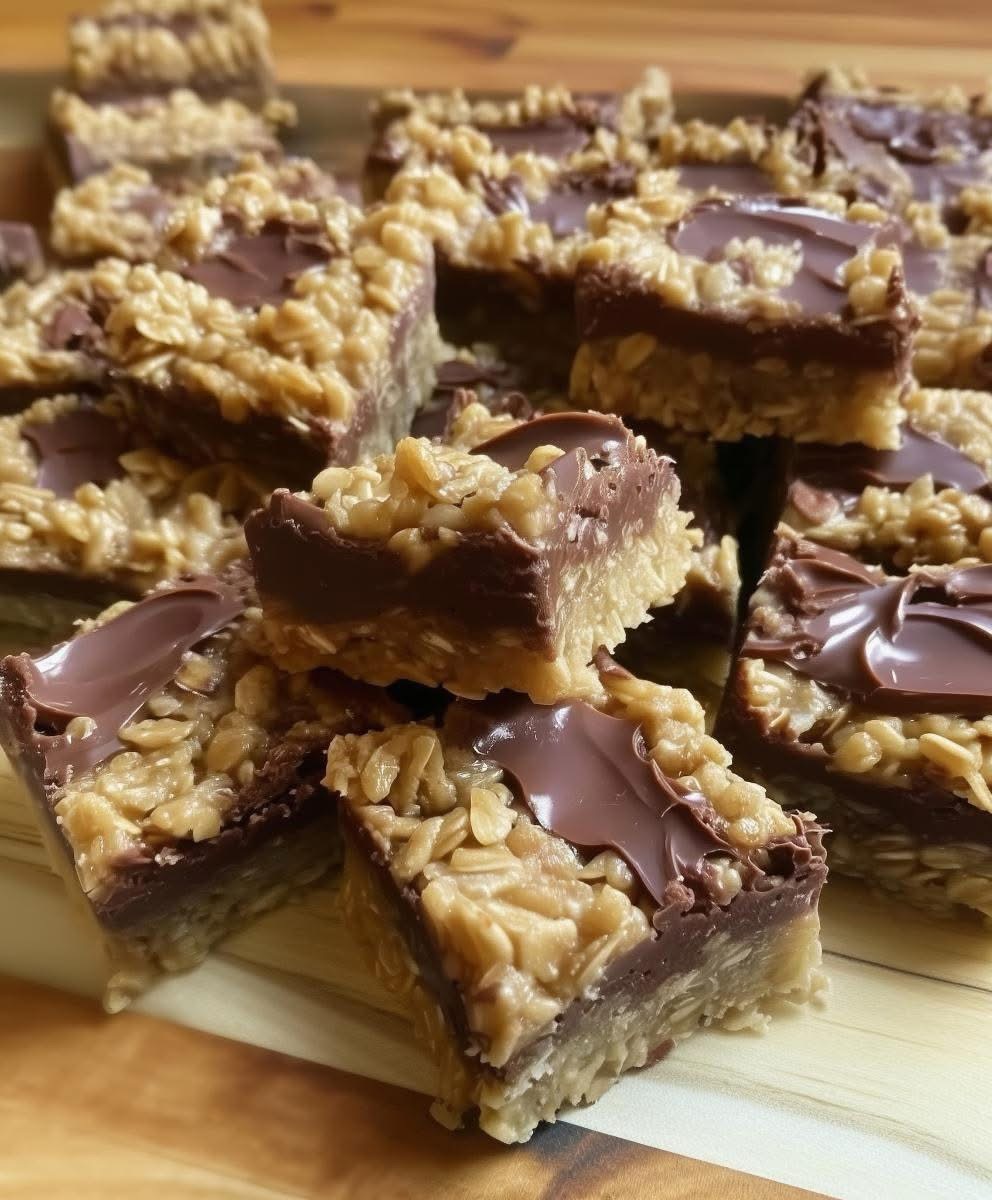
No-Bake Chocolate Oat Bars
These bars have a crumbly, chewy oat base and topping with a rich, creamy chocolate-peanut butter layer in the middle.
Prep time: 15 minutes
Chill time: 1-2 hours
Servings: 12-16 bars
Ingredients:
· For the Oat Crust & Topping:
· 1 cup (2 sticks / 225g) unsalted butter
· 1/2 cup (100g) packed brown sugar
· 1 teaspoon vanilla extract
· 3 cups (270g) quick-cooking oats (see note below)
· For the Chocolate Filling:
· 1 1/2 cups (265g) semi-sweet chocolate chips
· 3/4 cup (190g) creamy peanut butter
· A pinch of salt
Instructions:
- Prepare the Pan: Line an 8×8 or 9×9 inch square baking pan with parchment paper, leaving some overhang on two sides. This makes it easy to lift the whole block of bars out later.
- Make the Oat Mixture: In a medium saucepan over medium heat, melt the butter. Stir in the brown sugar and vanilla extract until the sugar is dissolved and the mixture is smooth. Remove the pan from the heat.
- Add the Oats: Stir in the quick oats until they are fully coated in the butter mixture.
- Press the Base: Press half of the oat mixture firmly and evenly into the bottom of your prepared pan. Set the remaining oat mixture aside.
- Make the Chocolate Filling: In a microwave-safe bowl (or using a double boiler), combine the chocolate chips and peanut butter. Heat in 30-second bursts, stirring well after each, until completely melted and smooth. Stir in the pinch of salt.
- Assemble the Layers: Pour the melted chocolate-peanut butter mixture over the pressed oat base. Spread it evenly with a spatula.
- Add the Topping: Take the remaining oat mixture and crumble it evenly over the chocolate layer. Gently press it down so it sticks.
- Chill Until Firm: Place the pan in the refrigerator for at least 1-2 hours, or until the chocolate layer is completely set.
- Slice and Serve: Once firm, use the parchment paper to lift the entire block out of the pan. Place it on a cutting board and slice into bars with a sharp knife.
- Store: Keep the bars stored in an airtight container in the refrigerator. They are best served cool!
Important Notes & Tips for Success:
· Oat Type is Crucial: Quick-cooking oats are essential for the right texture. They are smaller and absorb the butter mixture better, helping the bars hold together. Old-fashioned rolled oats are too large and will result in a crumbly bar that falls apart.
· Don’t Skip the Chill: The chilling step is what makes these bars “no-bake.” It solidifies the chocolate and butter, making them sliceable. If you try to cut them at room temperature, they will be messy.
· Press Firmly: Really pack down the bottom oat layer. This creates a solid foundation for the bars.
· Customize Your Bars:
· Add-Ins: Stir 1/4 cup of shredded coconut, chopped nuts, or dried cranberries into the oat mixture.
· Different Chips: Use milk chocolate or dark chocolate chips instead of semi-sweet.
· Nut-Free: Use sunflower seed butter instead of peanut butter.
Why This Recipe Works
It’s a simple lesson in food science! The melted butter and sugar create a “glue” that holds the oats together. The chocolate and peanut butter layer sets up firm in the fridge, creating a delicious, stable center. It’s magic without the oven!
Enjoy your delicious, easy-to-make treats