
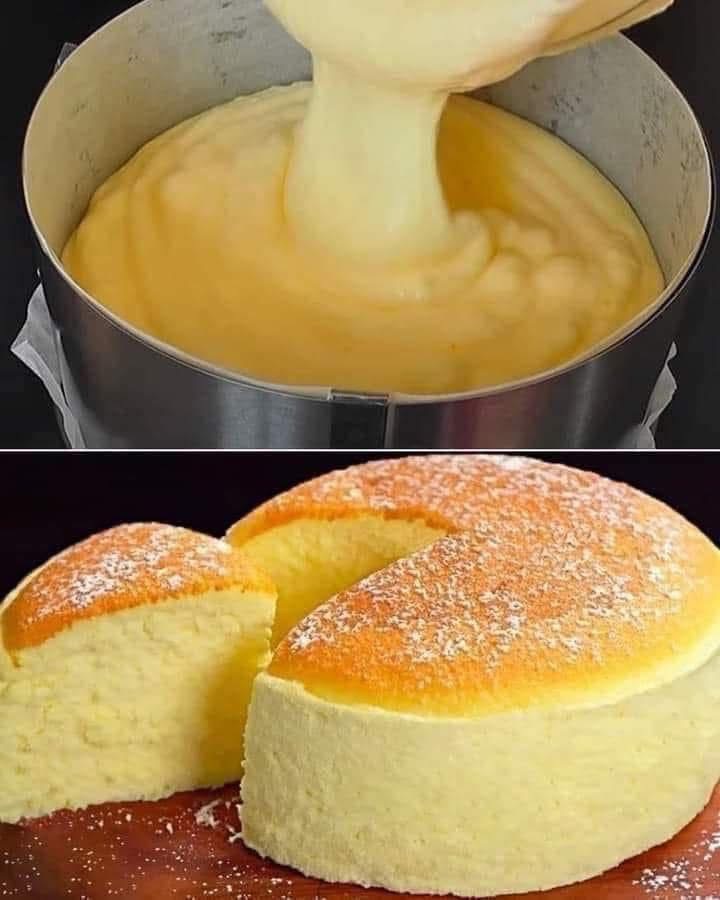
Absolutely! Japanese Cotton Cheesecake, also known as Soufflé Cheesecake, is a masterpiece of baking. It’s famous for its incredibly light, fluffy, and jiggly texture that melts in your mouth. It’s less sweet and much less dense than a New York-style cheesecake.
Achieving the perfect cotton cheesecake requires precision, but it’s absolutely achievable by following the steps carefully.
Japanese Cotton Cheesecake (Soufflé Cheesecake)
This recipe uses a water bath (bain-marie) and the folding of meringue to create its signature airy texture.
Prep Time: 30 minutes
Cook Time: 60-70 minutes + slow cooling in the oven
Chill Time: At least 3 hours, preferably overnight
Servings: 8-10
Ingredients
· 6 large eggs, separated, cold
· 8 oz (250g) full-fat cream cheese, softened to room temperature
· 4 tablespoons (60g) unsalted butter
· 100 ml (about 1/3 cup + 1 tbsp) whole milk
· 60 g (about 1/2 cup) cake flour (see note)
· 20 g (about 3 tbsp) cornstarch
· 1/4 teaspoon salt
· 100 g (about 1/2 cup) granulated sugar, divided
· 1 teaspoon fresh lemon juice or white vinegar
· 1 teaspoon vanilla extract
· Powdered sugar for dusting (optional)
Special Equipment:
· 8-inch (20cm) round springform pan
· Large roasting pan for the water bath
· Parchment paper
· Stand mixer or hand mixer
Instructions
Part 1: Preparation is Key
- Preheat Oven: Preheat your oven to 320°F (160°C).
- Prepare the Pan: Line the bottom of the springform pan with parchment paper. Do NOT grease the sides. The cake needs to cling to the sides of the pan to rise properly. Wrap the outside bottom and sides of the springform pan with a double layer of heavy-duty aluminum foil to prevent water from the bath seeping in.
- Sift Dry Ingredients: In a small bowl, sift the cake flour and cornstarch together. Set aside.
Part 2: Making the Cheese Batter
- Melt Cream Cheese Base: In a heatproof bowl set over a pot of simmering water (double boiler), combine the cream cheese, butter, and milk. Heat gently, stirring frequently, until the mixture is completely smooth and lump-free. Remove from heat and let it cool slightly.
- Temper Egg Yolks: Whisk the egg yolks and vanilla extract into the warm cream cheese mixture until fully incorporated.
- Incorporate Flour: Add the sifted flour and cornstarch to the cheese/yolk mixture. Whisk until you have a smooth, thick batter. Set aside.
Part 3: Making the Meringue (The Most Critical Step)
- Start Whipping: In a very clean, grease-free bowl, combine the egg whites and lemon juice (or vinegar). The acid helps stabilize the meringue. Using a stand mixer or hand mixer, beat on medium speed until the mixture becomes frothy.
- Add Sugar Gradually: Increase the speed to medium-high. Gradually add the sugar, about one tablespoon at a time, beating well after each addition. Continue beating until the meringue reaches soft peaks. This is crucial: the peaks should curl over when you lift the beaters. Do not beat to stiff peaks, as this can cause the cake to crack during baking.
Part 4: Folding and Baking
- Lighten the Batter: Take about 1/3 of the meringue and whisk it into the cheese batter. This will loosen the thick batter and make it easier to fold.
- Gentle Folding: Add the remaining meringue in two parts. Using a spatula, gently fold it in using a figure-8 motion. Be patient and gentle to avoid deflating the meringue. Stop as soon as no white streaks remain.
- Bake in Water Bath: Pour the batter into the prepared springform pan. Gently tap the pan on the counter a few times to release large air bubbles.
· Place the foil-wrapped pan into a large roasting pan.
· Carefully pour hot water into the roasting pan until it comes about halfway up the sides of the springform pan. - Bake: Place the roasting pan in the preheated oven and bake for 60-70 minutes. The cake should be golden brown on top, and it will still have a slight jiggle in the center.
- Slow Cool to Prevent Collapse: Turn off the oven. Crack the oven door open with a wooden spoon and let the cake cool inside the oven for at least 1 hour. This gradual temperature change is essential to prevent the cake from collapsing.
Part 5: Chilling and Serving
- Cool Completely: Remove the cake from the water bath and take off the foil. Run a thin knife around the edge of the pan to loosen the cake. Let it cool completely to room temperature on a wire rack.
- Chill: Once cool, cover the pan with plastic wrap and refrigerate for at least 3-4 hours, or preferably overnight. Chilling sets the structure and enhances the flavor.
- Serve: Carefully remove the springform ring. Dust the top with powdered sugar before slicing. Use a sharp knife dipped in hot water and wiped dry for clean cuts.
Tips for Success (The Golden Rules)
· Room Temperature is NOT for Eggs: For this recipe, cold eggs separate more cleanly. The whites will also whip to a more stable meringue when they start cold.
· Do NOT Grease the Pan: The cake needs to cling to the sides to rise. A greased pan will cause it to slide down.
· Soft Peaks, Not Stiff: Over-beaten meringue is the #1 cause of cracking. Stop when the peaks are soft and droopy.
· Gentle Folding: Deflating the meringue means a dense cake. Fold with care.
· Patience with Cooling: Rushing the cooling process will cause the cake to collapse. The slow cool in the oven is non-negotiable.
· Cake Flour Substitute: If you don’t have cake flour, you can make a substitute: For every 1 cup of all-purpose flour, remove 2 tablespoons and replace it with 2 tablespoons of cornstarch. Sift together several times. For this recipe, use 1/2 cup AP flour minus 1 tablespoon, plus 1 tablespoon cornstarch.
Enjoy the light, cloud-like, and delicious results of your patience and care