
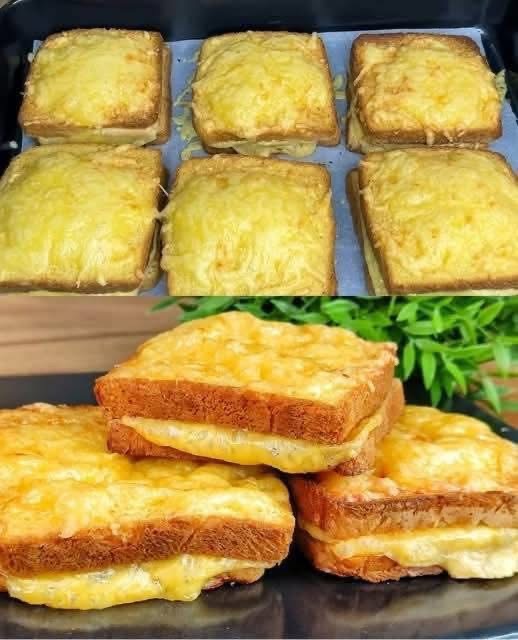
Of course! The Grilled Cheese Sandwich is a deceptively simple masterpiece. Achieving that perfect, crispy, golden-brown exterior with a molten, evenly melted cheese interior is an art. Here is the ultimate guide to making the best grilled cheese sandwich.
The Golden Rules for the Perfect Grilled Cheese:
- Low and Slow: Cook over medium-low heat. This allows the bread to toast evenly and golden without burning before the cheese has a chance to melt completely.
- Spread Fat on the Bread, Not in the Pan: Spreading butter or mayonnaise directly on the bread ensures every single inch gets crispy and brown.
- Grate Your Cheese: Pre-sliced cheese is convenient, but grating your own cheese from a block allows it to melt faster and more evenly.
- Use a Lid: Covering the pan for the first half of cooking traps heat and steam, helping to melt the cheese thoroughly.
Classic Grilled Cheese Sandwich Recipe
Ingredients (for 1 sandwich):
· 2 slices of hearty bread (sourdough, country white, or Texas toast are ideal)
· 1.5 to 2 oz (about ½ cup) grated cheese (see recommendations below)
· 1 tbsp softened unsalted butter or 1 tbsp mayonnaise
· Tiny pinch of salt (optional, enhances flavor)
The Best Cheese Blend (Choose one):
· The Classic: Sharp Cheddar (for flavor) and Monterey Jack (for meltiness)
· The Ultimate: Gruyère (nutty flavor) and Fontina (super creamy melt)
· The Simple: American cheese (unbeatable melt, great for kids)
Instructions:
- Prepare the Bread: Spread the outside of each slice of bread with a thin, even layer of softened butter or mayonnaise, making sure to cover the entire surface from edge to edge.
· Butter vs. Mayo Debate: Butter gives a rich, classic flavor. Mayonnaise (made with oil and eggs) creates an incredibly even, crispy, and flawless golden crust every single time. It’s a game-changer. - Assemble the Sandwich: Place one slice of bread, buttered-side down, in a cold, non-stick or cast-iron skillet. Pile the grated cheese evenly on top, avoiding the very edges. Sprinkle with a tiny pinch of salt. Top with the second slice of bread, buttered-side up.
- Cook Low and Slow:
· Place the skillet on the stovetop and turn the heat to medium-low.
· Cook for 3-4 minutes, until the bottom slice is a deep, golden brown. You can gently lift a corner to check.
· Cover the skillet with a lid for the first 2-3 minutes to help the cheese start melting. - The Flip:
· Carefully flip the sandwich with a spatula. If any cheese falls out, just tuck it back in.
· Press down gently on the sandwich to ensure even contact with the pan.
· Cook for another 2-4 minutes uncovered, until the second side is equally golden brown and the cheese is completely melted. - Serve Immediately:
· Transfer the sandwich to a cutting board and let it rest for just 1 minute (this allows the cheese to set slightly so it doesn’t all ooze out when you cut it).
· Slice diagonally and serve immediately.
Pro Tips & Epic Variations:
· The Smash: After flipping, press down gently with your spatula. This increases contact with the pan for better browning and helps melt the cheese.
· No Grate, No Problem: If using pre-sliced cheese, let it come to room temperature for faster melting.
· Add-ins (Add after cheese, before top bread):
· Classic: A few slices of tomato (pat them VERY dry with a paper towel first).
· Breakfast: Crispy cooked bacon or ham.
· Gourmet: Thinly sliced apple or pear, caramelized onions, or a smear of fig jam.
· Spicy: Sliced jalapeños or a dash of hot sauce.
· The “Inside” Trick: For an extra-rich sandwich, spread a very thin layer of mayonnaise on the inside of the bread before adding the cheese. It will toast the interior and add flavor.
· Air Fryer Method: Assemble the sandwich and air fry at 370°F (188°C) for 6-8 minutes, flipping halfway through, until golden brown.
Troubleshooting:
· Burnt outside, cold cheese inside? Your heat was too high. Always use medium-low.
· Soggy bread? You didn’t spread fat all the way to the edges, or the heat was too low.
· Cheese not melting? Your cheese was too cold, the pan was too hot, or you didn’t use a lid.
Enjoy the perfect, crispy, cheesy, and comforting masterpiece you just created